
Project introduction and setting up Excel sheet
I was given a project: find me all faculty who were onboarded 3 months ago. The resource is a spreadsheet that contained all users, their ranks, appointment date, etc. A manual process to achieve this would be to sort all the faculty, and then copy and paste the data into a separate spreadsheet. The client had been doing things manually up until that point but wanted some kind of automated way of doing it.
I decided to leverage Power Automate to extract data from the spreadsheet.
It’s generally a good idea to work with a small subset of data when tackling a project like this, rather than work directly on the full data set. I first set up a sample spreadsheet with headers to match the faculty list, and then created fake data to protect privacy during the testing process.
While I imagine I could have taken a Power Automate class on LinkedIn or another platform, I tend to prefer to learn what I need to learn while I am working on a project, so I conducted a number of Google searches to help me get started.
Here are some of the initial resources from which I drew inspiration
- Power Automate Tutorial: Read from Excel and Send Email
- Different ways of getting Excel data using Power Automate
From there I just jumped right in. I learned that I needed List Rows, and not Get Row. I started with Get Row and it wanted a Key Value. I thought, what is a Key Value, so I looked it up. And I got told that a Key Value is a Key Value. Well, that’s not helpful. So then I realized that the Get Row function only works on unique values (a.k.a. key value).
Sometimes I really wish that computers spoke human, or that the helpful hints were actually helpful.
In using the List Rows function, I learned that Power Automate REALLY wants a table name. Not a worksheet name, which is what I expected, but a TABLE name. How do you set a table name in Excel Online? Numerous Google searches did not get me very close but I figured it out.
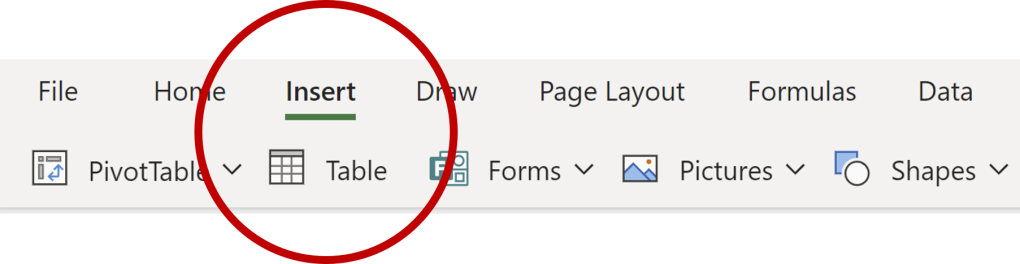
You use the INSERT menu, then hit TABLE, and you set the range of the table. You cannot just choose columns – tables must have a limit, so I set my table to be 1000 records, since we have about 850 people in our list at any given time.
NOTE: While testing your Power Automate flow through Part 4, set the table size to the exact number of rows that contain data. Part 6 will explain how to add a condition for ensuring that you can have data expansion and won’t need to edit the size of the table each time.

Once you’ve created the table using the INSERT menu, you can then click on the TABLE DESIGN menu item, click on the name of the table and change it.
The second key thing I learned with the List Rows function is to open the advanced menu option and set your Date Time Format to ISO 8601. This formats all of your dates to 2023-06-15 so you can actually manipulate them. Before changing this setting, I was trying to convert serial numbers into date formats and it was not fun.
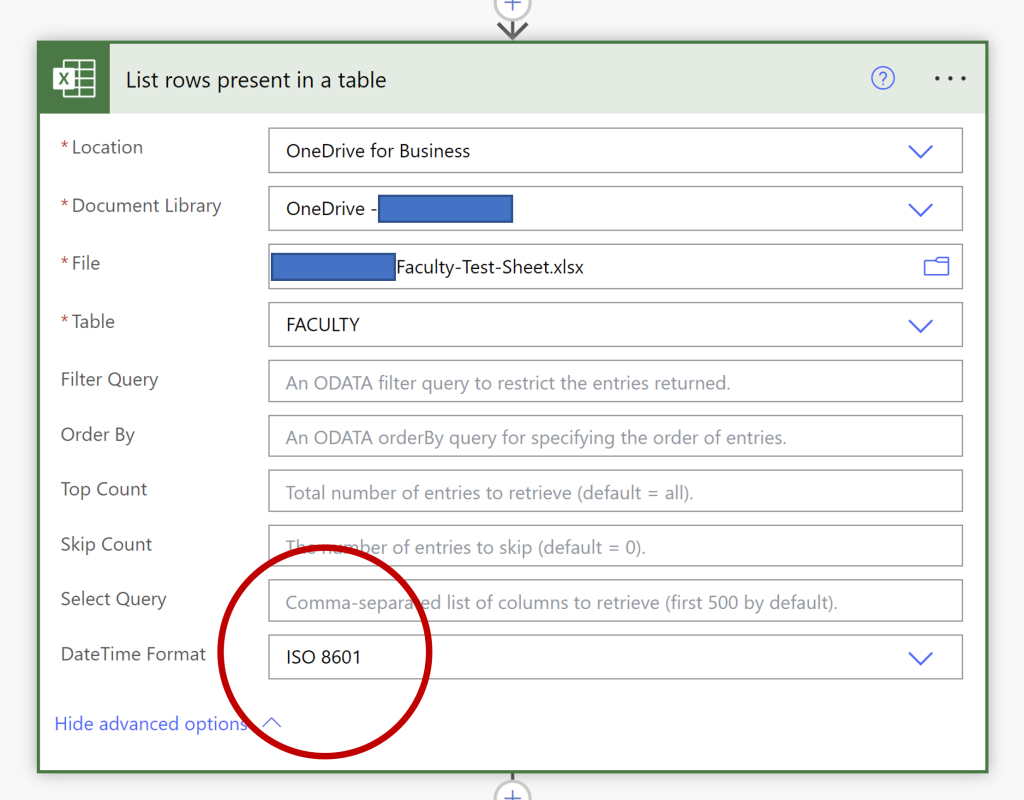
Beyond that, the List Rows function is pretty straight forward. It asks you for the location of the file, in which folder it lives, the name of the file, and if you have a table configured, it will allow you to pick the table. Then you set the date to be in ISO format, and save your Flow before you continue on to Part 2.
Overriding 256 row limit in Excel
By default, Microsoft limits the number of rows that it will process per session. The default limit is 256. If your file contains more than 256 rows, this won’t be very helpful.
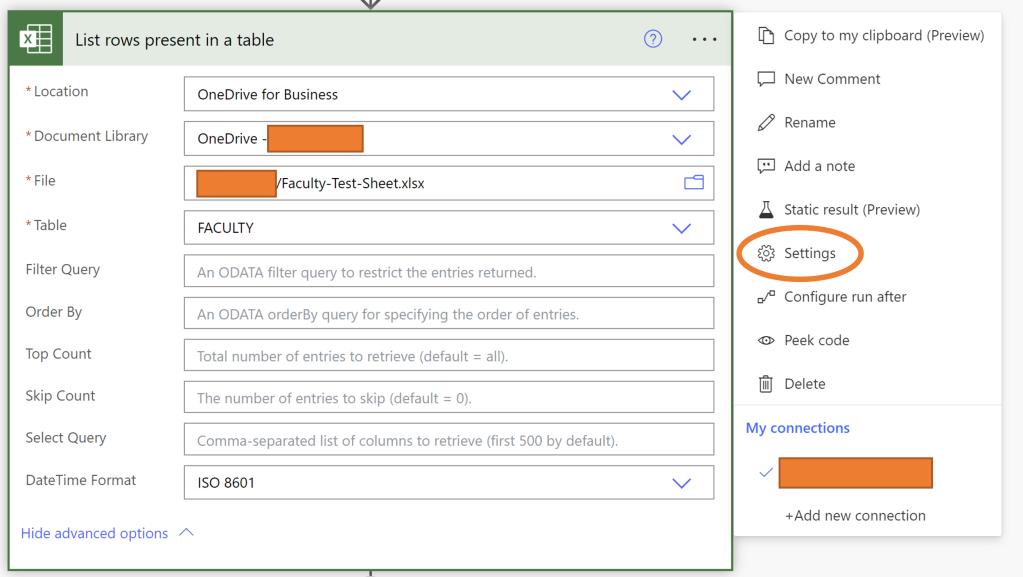
To override this limitation, click on the … dots in the List Rows present in a table action and access Settings.
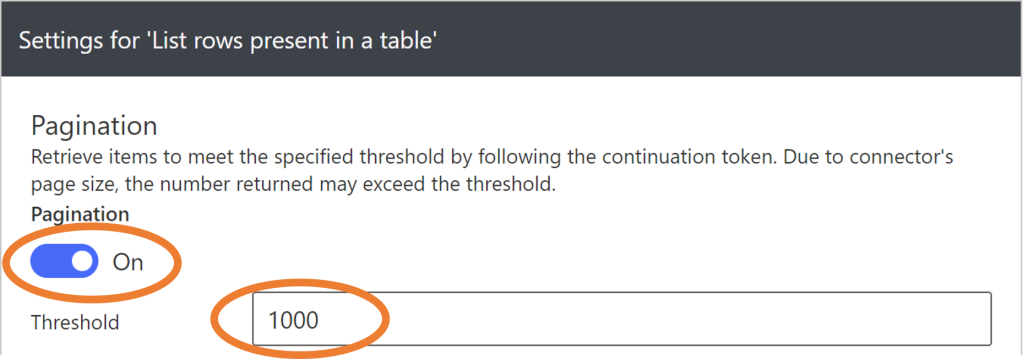
Enable Pagination and then set the number of records you want to process in a single call in the Threshold value. The example above shows 1000 as our database contains 850 rows currently.

5 thoughts on “Extracting data from Excel using Power Automate (Part 1)”