We all use the mouse button to place the cursor in a Word document, Spreadsheet, etc.
You may know that if you double-click the mouse button within a word, the application will select a whole word.
But are you familiar with the various ways that triple-click can make your life easier?
Here are some common behaviors associated with triple-clicking:
Selecting a Paragraph: In many text editors or word processors, triple-clicking on a paragraph selects the entire paragraph. This can be a convenient way to quickly select and manipulate blocks of text.
Selecting a Line: In some applications, like code editors or plain text editors, triple-clicking on a line selects the entire line of text.
Selecting a URL: In web browsers, triple-clicking on a URL usually selects the entire link, making it easier to copy or open.
Ooops. You just just accidentally closed a browser tab you were looking at and you just lost the website you were looking at. You don’t know what the address was, but you still want to go back to read it.
You can go to the browser history and try to restore it there.
A quicker way might be to use the combination shortcut of Ctrl + Shift + T.
Holding down both the Control and Shift keys, followed by hitting the letter T will restore the last browser tab you closed. It can also restore an entire window of tabs if you accidentally closed the entire window.
Conversely, Ctrl + T will open a brand new tab without you having to use the mouse to click to open a new tab.
This works for Google Chrome, FireFox, and Microsoft Edge.
I was given a project: find me all faculty who were onboarded 3 months ago. The resource is a spreadsheet that contained all users, their ranks, appointment date, etc. A manual process to achieve this would be to sort all the faculty, and then copy and paste the data into a separate spreadsheet. The client had been doing things manually up until that point but wanted some kind of automated way of doing it.
I decided to leverage Power Automate to extract data from the spreadsheet.
It’s generally a good idea to work with a small subset of data when tackling a project like this, rather than work directly on the full data set. I first set up a sample spreadsheet with headers to match the faculty list, and then created fake data to protect privacy during the testing process.
While I imagine I could have taken a Power Automate class on LinkedIn or another platform, I tend to prefer to learn what I need to learn while I am working on a project, so I conducted a number of Google searches to help me get started.
Here are some of the initial resources from which I drew inspiration
From there I just jumped right in. I learned that I needed List Rows, and not Get Row. I started with Get Row and it wanted a Key Value. I thought, what is a Key Value, so I looked it up. And I got told that a Key Value is a Key Value. Well, that’s not helpful. So then I realized that the Get Row function only works on unique values (a.k.a. key value).
Sometimes I really wish that computers spoke human, or that the helpful hints were actually helpful.
In using the List Rows function, I learned that Power Automate REALLY wants a table name. Not a worksheet name, which is what I expected, but a TABLE name. How do you set a table name in Excel Online? Numerous Google searches did not get me very close but I figured it out.
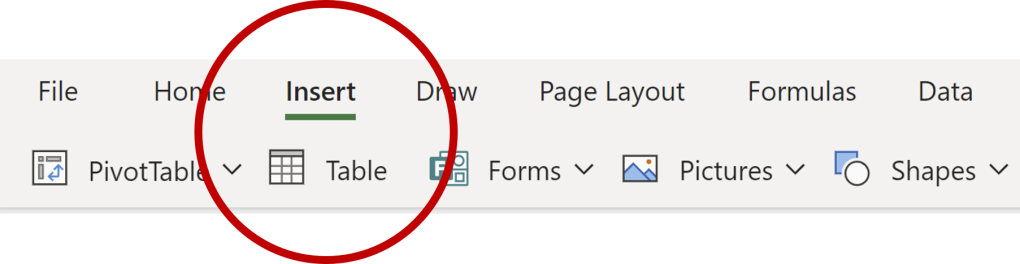
Use Insert Table to create a table that Power Automate can use.
You use the INSERT menu, then hit TABLE, and you set the range of the table. You cannot just choose columns – tables must have a limit, so I set my table to be 1000 records, since we have about 850 people in our list at any given time.
NOTE: While testing your Power Automate flow through Part 4, set the table size to the exact number of rows that contain data. Part 6 will explain how to add a condition for ensuring that you can have data expansion and won’t need to edit the size of the table each time.
Give your table a name after you create it
Once you’ve created the table using the INSERT menu, you can then click on the TABLE DESIGN menu item, click on the name of the table and change it.
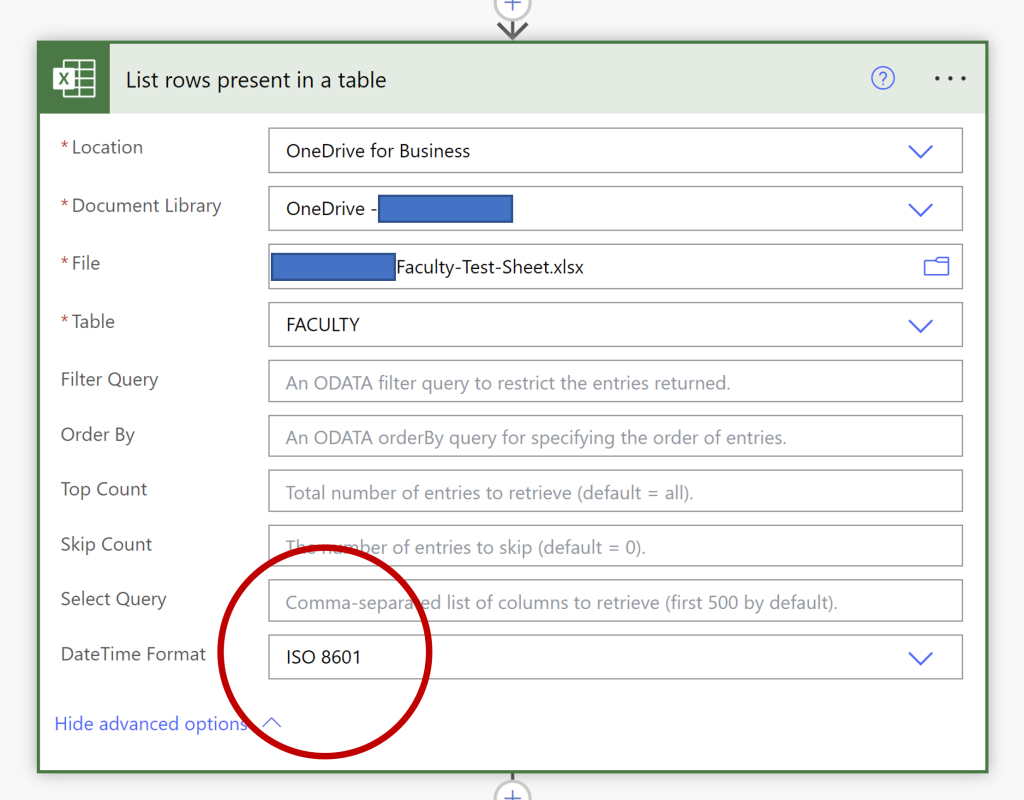
The second key thing I learned with the List Rows function is to open the advanced menu option and set your Date Time Format to ISO 8601. This formats all of your dates to 2023-06-15 so you can actually manipulate them. Before changing this setting, I was trying to convert serial numbers into date formats and it was not fun.
Under Advanced Options, set DateTime Format to be ISO 8601
Beyond that, the List Rows function is pretty straight forward. It asks you for the location of the file, in which folder it lives, the name of the file, and if you have a table configured, it will allow you to pick the table. Then you set the date to be in ISO format, and save your Flow before you continue on to Part 2.
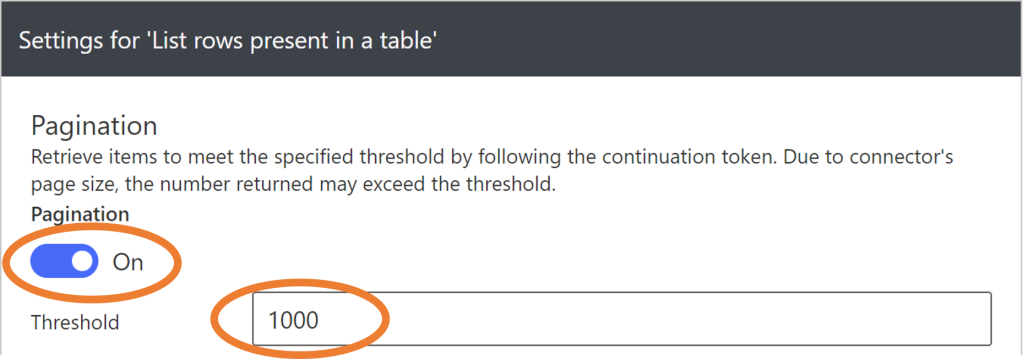
Overriding 256 row limit in Excel
By default, Microsoft limits the number of rows that it will process per session. The default limit is 256. If your file contains more than 256 rows, this won’t be very helpful.
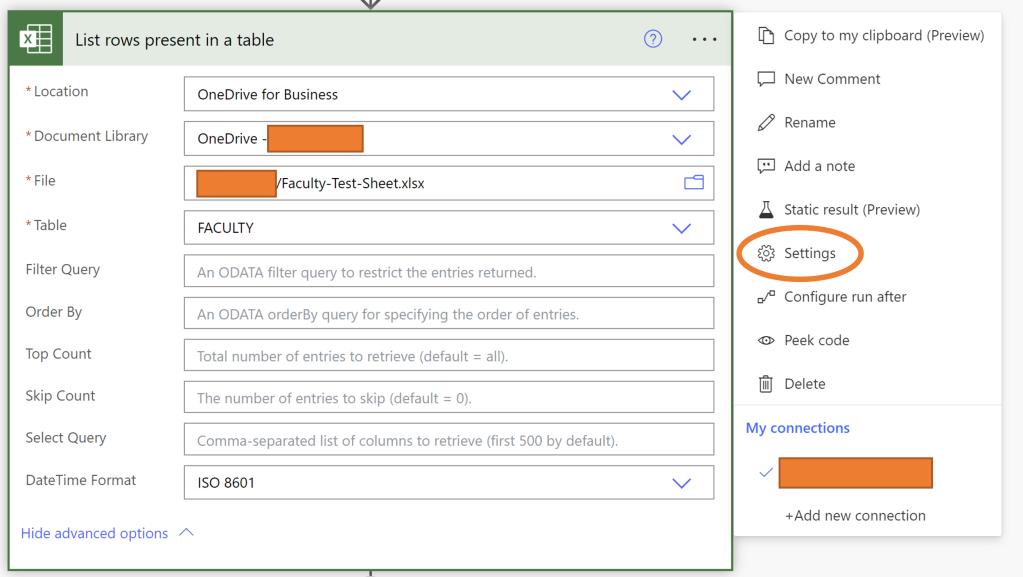
Use the … dots to access the Settings menu
To override this limitation, click on the … dots in the List Rows present in a table action and access Settings.
Enable Pagination and set your Threshold to the number of rows you want to check.
Enable Pagination and then set the number of records you want to process in a single call in the Threshold value. The example above shows 1000 as our database contains 850 rows currently.
Hello all, and thank you for perusing my site over the years. I just reviewed the statistics and it looks like I have helped thousands of viewers over the years with what I have learned. I am hopeful that my documenting my work has been valuable to you.
It has been a while since I posted on this blog, and I hope to restart my efforts in the coming weeks. In the past 5 years I switched jobs to working primarily with web content and the Adobe Experience Manager content management system. My employer mostly used Google Suite, and there weren’t too many difficult things in my role that I needed to document. Now I have a new role and our employer is moving to the Microsoft Office 365 platform. My new role involves a lot of use of Excel and Microsoft Teams, and so far I have done a few projects in Microsoft Power Automate, which I plan to document for you in the coming weeks. I will also be exploring the use of VBA macros as I seek to help people at my workplace automate some of their practices.
Again, thank you very much for your visit, and I hope to spend more time with you in the coming weeks and months.
As a long time Microsoft user, I must admit some bias toward using Office 365 products, but the more I investigate G Suite and its capabilities, the more I gain respect the Google framework – especially its ability to integrate its products into one another – something I feel Microsoft lacks at times.
On the surface, when you ask people about collaborating in one space or another, you hear the same actions being taken by G Suite users as you do from Office 365 users. In reviewing both sides of the spectrum, it is clear that there doesn’t need to be an either/or scenario between Office 365 and G Suite. We *can* and *should* embrace the AND.
This is one reason why, when talking of collaboration, I tend not to mention platforms. My team could have accomplished the same work in either the G Suite or the Office 365 space, and therefore I believe the answer lies is less in “which is best?” but rather in “where do you spend your time?”
The more I explore both worlds, I don’t know if there is a “best” suite for the job. As you’ll be able to gain from reviewing the list below, both platforms have similar tools. I will explore more specific similarities and differences of each of these tools in future articles, but for right now, let’s just look at what each suite contains.
Feature
G Suite
Office 365
Browser
Chrome
Internet Explorer / Edge
Word processing
Docs
Word
Spreadsheets
Sheets
Excel
Presentations
Slides
Powerpoint / Sway
Email
Gmail
Exchange / Outlook
Pages
Sites
Office 365 Sites / SharePoint
Drive storage
Drive
OneDrive
Instant messaging
Talk
Lync / Skype / Yammer
Video conferencing
Hangouts
Lync / Skype
Social Network / Collaboration
Google+ / Groups
Yammer / Groups / Teams
Notes
Keep
OneNote
Data Gathering
Forms w/ Sheets
Forms w/ Excel
Native search engines
Google search
Bing / Fast Search
Taking these platforms from a Bird’s Eye view, it quickly becomes clear that at a very basic level, both platforms have the tools you need to accomplish the task. Using a construction analogy, they both have hammers, they both have saws, they both have pliers, they both have clamps. And that’s why, from an initial standpoint, let’s embrace the AND, rather than the OR, and keep an open mind as to using the tools from each brand.
Going forward, I will likely be sharing new features for both Microsoft and Google as I run across them.
Hiding headers in SharePoint can be very handy when you don’t want that “Spreadsheet” look. It’s also a useful feature for when you have created some “Group By” or other out of the ordinary views, and the header row just kind of hangs out there.
To hide the header row, create a Snippet Editor web part from the Media and Content folder and add the following CSS snippet.
I love it when we can collaborate with others in the division. I shared my browser workaround with a few folks and someone sent me the link to the LifeHacker.com article that walks through the following steps.
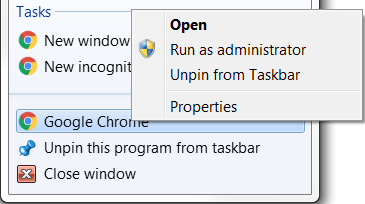
Many of us have Google Chrome pinned to our task bar. Right-click on that pinned Google Chrome icon, right-click on Google Chrome, and choose Properties
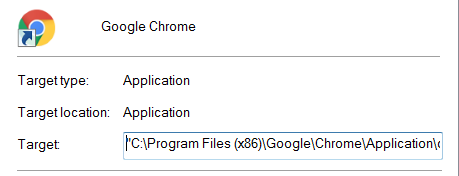
Click in the Target: field and use the End button on your keyboard to get to the end of the field.
In the address area for “Target:” you will need to add the following command to the end of the target path (–pinned-tab-count=x) making certain to leave a single space in between the final quote mark and the “pinned tab count command”. Enter the number of permanent pinned tabs that you would like to have in place of the “x”… in my example below, it shows the number of tabs as 3.
The second part of this process is to add the URL for each of the websites you want to have open in your (in this case, 3) tabs. Be sure to have a single space between each URL and the pinned tab count command as shown below.
If you work at a company where the IT staff has locked down the capability to modify your Startup feature in Chrome, here’s a workaround to your ability to open your favorite sites in one click.
One of my favorite time saving devices that I have used is setting the home page on my browsers to open certain pages. In talking with some folks in the division, they use this feature also. When the decision was made to override our home page settings, I looked to other solutions for maintaining my ability to open multiple tabs without the need for the home page settings.
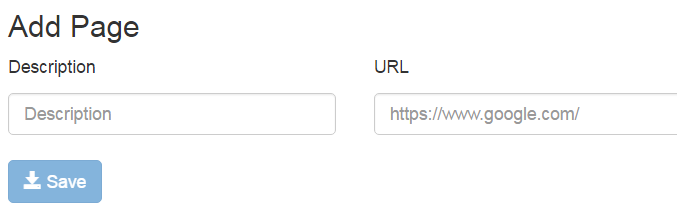
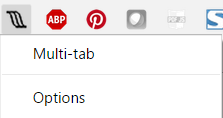
When you first load it, it will show you the options screen where you can add your descriptions and the URLs
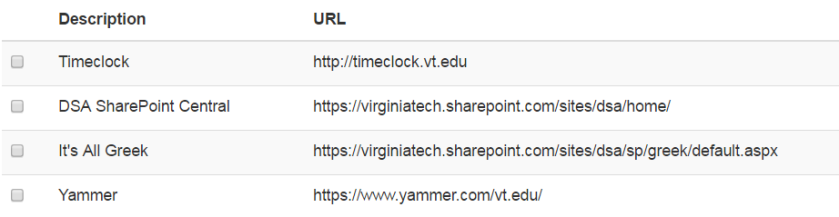
Add your favorite sites (you may need to browse your history if you don’t have those links saved anywhere), so that you end up with a list similar this one.
Clicking on the app icon will launch the tabs you have saved.
To make changes to your tabs, right-click on the app icon and choose Options.
You can drag and drop the order of your tabs as well which is helpful.
The only thing you cannot do is edit an existing tab, so you would need to select it, delete it, and add a new one.
Overall, this is a nice, single-click workaround to the limitations of locking down the home page options.
If you work at a company where the IT staff has locked down the capability to modify your Startup feature in Internet Explorer, here’s a workaround to your ability to open your favorite sites in a couple of click.
Setting it up
First, if you don’t have the menu bar showing on your IE, right-click at the top of the browser window and choose menu bar.
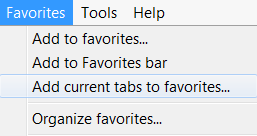
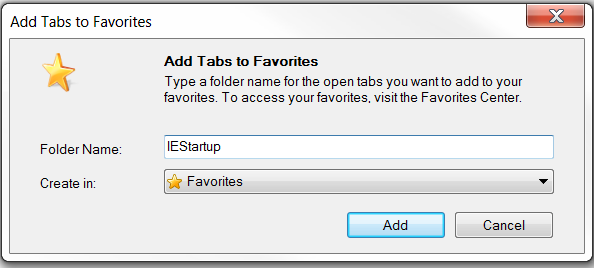
Open the websites that you normally launched on Startup, then from the Favorites menu, choose Add current tabs to favorites
Give your folder a name
Opening multiple tabs in Internet Explorer in 3 clicks
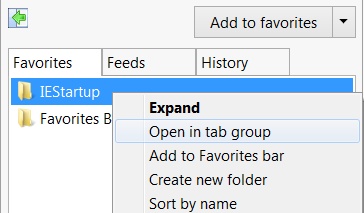
Next time you load Internet Explorer, click on the Star icon located between the Home and Gear icons at the top right of the browser.
Right-click on the name of the folder, then select Open in tab group