Organize your OneNote: Using Notebooks

In the past few posts we’ve discovered the different ways you can organize your OneNote documents, using pages & subpages, sections, and section groups. The next – and final – level of course is a new Notebook.

Some people create a new notebook for every topic, and while that is ok, I caution you against having too many notebooks when you can organize much of your content in one Notebook. So when should you step out and create a new Notebook?

Here are a couple of criteria I use for making that decision.

  • Sharing needs: While you don’t have to create new notebooks; you can create password-protected sections, I generally create a new notebook when I need to share the information with other people.
  • Distinct topic differences: If the subject matter is completely different from anything else you’re working on, it might be worth creating another notebook.
  • Topic content outgrows capacity: Sometimes a topic that used to be in a section or section group of a more general Notebook just outgrows the ways to keep track of the topic inside that Notebook. Perhaps you already have a section group for that content, and you find you’ve outgrown that. It might be worth to create a Notebook to hold that topic.

Creating a New Notebook

When you create a new Notebook in OneNote, make sure you choose to place this file either on your SharePoint site or in your OneDrive. My preferred method for creating OneNote Notebooks is to go to the location within SharePoint or OneDrive and choose to add a New OneNote notebook from the dropdown.

OneDrive Dropdown showing Word document, Excel document, PowerPoint presentation, OneNote notebook, Excel Survey

Once you’ve created a file, then use the EDIT IN ONENOTE link to open this new document in your desktop version of OneNote.

OneNote: Edit in OneNote

Your notebook will then appear in your notebooks list on the left hand side of your OneNote application. If you don’t see the list as shown below, click the dropdown arrow next to your notebook’s name, and then use the PIN icon to pin your notebooks list to the left.

Notebooks: My Notebook, Projects, DSA OneNote

I prefer creating OneNote notebooks online and then linking them to the desktop application because then I don’t have to worry about knowing the path to which I need to save the document.

You can also create OneNote notebooks using the application. If you do that, please make sure you choose either Sites – YourCompanyName or OneDrive – YourCompanyName as your location, and then use the Browse button to find the path to your folder on your SharePoint site or in your OneDrive.

OneNote: Create a new document from OneNote

Organize your OneNote: Using Section Groups

I started off talking about how I use Pages as a starting point for my organization, and then when I outgrow Pages I move on to Sections.

Sections appear along the top of your work space. While you can have as many sections as you want, one thing to note is that your desktop application real estate is only so large and therefore, depending on the length of your section names, your application real estate only allows the room for about 8-12 sections before they disappear in a drop-down menu.

OneNote: section drop-down showing 5 blank sections

While the use of the drop-down menu is generally not a big deal if there are some sections you rarely use, I personally don’t like having to use a drop-down menu. At the same time though, it doesn’t always make sense to create a new Notebook just because you can’t see the section tabs.

Section Groups allow for that middle ground, where you can group your sections into similar topics (e.g. meetings) while still allowing all of your meeting notes to stay together with the rest of your file.

The two most commonly used section groups in my Notebooks are Meetings and @MySpace, where I keep things that belong to the overall topic discussed in the Notebook, but are just my notes to myself or random thoughts or collected information that I’m not ready to put out into the rest of the book just yet.

OneNote: Subsections showing on left menu: Blog Posts and Emails; Tutorial Scratch Files; @MySpace; Committee Work; Dept A-M; Dept N-Z; Meetings

Our divisional finance team uses Section Groups to name their budget codes, Sections for each of the months in the fiscal year, and Pages for the individual invoices and purchase orders. That way they can have multiple budget codes but still keep their information in a single file for a department.

Image showing section groups for finance budget codes 122318, 122325, 120917 and V00173

Using section groups works best when you are using the desktop version of OneNote, and you have the notebooks “pinned” to your left sidebar, because you’re able to view all of your section groups and sections at a glance.

Across the top of the page, you will see any top-level sections as well the names of section groups. When clicking on a section group in the top bar, only the sections within the section group will show.

OneNote Section bar showing section groups
When you open a section group for the first time, it can be a little disconcerting because it appears you’re “stuck” inside that section group, as you no longer see the remaining portions of the notebook. The little green “return to top” arrow will get you back to the top level of your Notebook so you can navigate to the rest of it again.

OneNote: Section Group Bar showing 5 tabs, with a little arrow on the left that would take me up a level Smart Tip

If you use section groups, keep the most-used sections at the top level, so that you can easily access them without needing to go into section groups. As shown in my working notebook above, I keep the blog post and tutorial scratch tabs at the top level because I use them all the time, and I don’t want to have to click into a section group to do my daily work. I like that OneNote lets me have the flexibility to do what works for me.

Organize your OneNote: Using Sections

When using OneNote it’s important to come with a way for you to organize your information for easy retrieval. In a previous post I talked about using Pages as a primary means for organizing your work in OneNote and I noted that within my various notebooks I have several sections that contain more than 100 pages yet are still very easily managed.

Using sections to organize your content

Yet sometimes pages isn’t enough and more sections need to be created. My decision to move beyond one section to another is based on a distinct separation of topics, or workflow.

For example, blog posts and tutorials to me are very different. While both are informational in nature, tutorials tend to have a more instructional format and also tend to be quite a bit longer. I purposely don’t mix the content between blog posts and tutorials so that I can keep the different types of content separate. I also keep video scripts separate because creating videos, like creating tutorials, is a task that’s very different than writing a blog post. Meeting notes are also separated in a different section, but I might have multiple people separated by asterisks in one big section. I could have had meeting pages within my topic sections separated by asterisks but I found it easier to put all the meeting notes in one place rather than have to hunt for them in multiple sections.

Find your own way to organize your content

Your choice of when you move from one section and multiple pages to having multiple sections is a personal one should help you with separating and organizing your work. For me, it needs to make sense to create a new section and there should be sufficient content to create a new section. If you find you have lots of sections with only one or two pages each you might want to consider going to the Organize your OneNote: Using Pages post and reviewing how that works.

Creating new sections.

Create a new section by clicking on the + tab, and then give your new section a name.

One Note: Use the Plus Sign to create a new section

One Note: a highlighted section name which you can change

Use the Add Page feature to create new notes on that topic.

Page tab showing a line of asterisks followed by TOPIC TITLE another line of asterisks then two page titles: Info page one and info page two

Organize your OneNote: Using Pages and Subpages

Oftentimes when people start with OneNote they feel they need to create a Notebook for each topic. Please resist that temptation; work from one notebook to start if you can. It will be easier to manage in the long run. Where I have multiple books it usually has to do more with who else is sharing that book than it does with the content within each one.

Organize your OneNote using Pages

I tend to start working with pages first and organize as many pages as possible within one section, essentially until the subject matter just gets too involved to where sorting by pages doesn’t work anymore.

One way I sort by pages is to put spacers in between content types. The way I do that is to create a page with a title of asterisks so it looks like this:

Shows a row of asterisks that were placed in a OneNote page title

Then I create a page with title for the topic I’m writing about, followed by another page with asterisks in the title. The end result looks a little like this:

Page tab showing a line of asterisks followed by TOPIC TITLE another line of asterisks then two page titles: Info page one and info page two

It’s a way for me to visually separate the information without needing to use multiple sections, and thus will then allow me to search all the pages within the current section.

Another way to use Pages to help you sort content is through the use of Subpages. Subpages allow you to “roll up” or “collapse” your content so that you can keep certain information together.

Page tab showing ROLL UP CONTENT page followed by two indented sub pages: rollup content page one and two

You create subpages by dragging the page title over to the right so it looks indented, as above. The little arrow next to the ROLL UP CONTENT example above will let you collapse those two pages under ROLL UP CONTENT so that it takes up less space. Note: The ability to collapse or expand only works in the desktop version of OneNote.

Page Tab showing page titles only, no subpage titles are showing. There are down arrows on the right hand side of the page titles for expansion

Subpages work two levels deep, though the second level does not roll up. I personally don’t use this second level very often, but it can be helpful in further separating like-but-not-quite-the-same items.

Page tab with two levels of subpages. The second layer of subpages does not roll up into the first level of subpages.

Between the use of asterisks to visually separate your content, along with the use of subpages to further organize your notes, you can go a long way toward keeping your information in one section.

OneNote: Page Titles using asterisks to separate roll up content
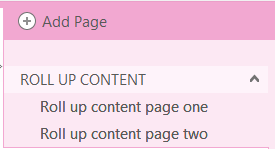
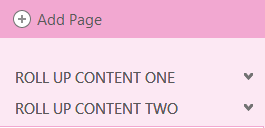
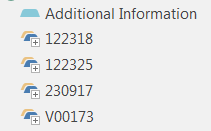
My daily working file includes a section for emails and blog posts which contains over 200 pages, and I use the asterisks to visually separate that information and the subpages to roll up content I no longer need. I have another section for Tutorial Scratch Files which are sorted in a similar fashion. I use that section to capture screen shots as I am working within SharePoint or another Office365 tool so I can create tutorials in the future. As tutorials get created, I am able to drag the page to the “completed” section in my list, without needing to move the page to another section.

In the various notebooks I use I have several sections that contain more than 100 pages and through the use of subpages and asterisks they’re still manageable.

My decision to move beyond one section to another is based on a distinct separation of topics, and I’ll explore that further in an upcoming post.

Organizing your OneNote: Pages, Sections, Section Groups, Notebooks?

One question that comes up fairly frequently is How do I organize my information in OneNote?

That question then invariably generates a bunch of different options:

  • Using pages
  • Using pages and subpages
  • Using sections
  • Using section groups and sections
  • Using different notebooks

Of course, just like the methodology for using planners is a very personal choice, so is the use of OneNote. My way may not work for you, and your way may not work for me.

Over the course of this month I will share with you how I organize information in my OneNote notebooks, using a variety of different methods. Hopefully this will give you some ideas on how to organize your electronic binder.

Use Case: Collaborating in the Cloud

Collaboration is everywhere, and Cloud Services are proving to be a wonderful collaboration tool. Take this weekend for example. I was helping a husband and wife team with some marketing for their business. They had cards with their customer contact information, they had some printed articles written by a colleague, and copies of old brochures that they wanted to refresh with a new look.

While one of them entered the contact list into a cloud spreadsheet, the other used the text-to-voice feature on a smart phone to dictate the articles and brochure content into a word processing document that was located in the cloud. After dictating the content from the phone, he edited the content directly in the online document on his computer. While they were doing the data entry and copy creation, I worked on making the brochures, using the content that had been edited in these documents.

We were working on three separate machines, all in the same room. My team’s knowledge of computers was fairly basic, and thus the cloud experience offered a very calm space where we could all see the work at the same time and talk through the work, without the need to talk through the steps of transmitting the work or walking around the desk to view someone’s monitor. I was able to access the content without the pesky need to email or upload files, and it was almost pure heaven.

When a field was missing in the contact list, I was able to add it to the spreadsheet in my browser, and when it showed up on her end, she could enter the necessary information. When he needed bullets in his content, I could just give him bullets without needing to talk him through how to create them, or walk over to his machine to add them.

Before working in the cloud, we would have needed a local server, USB sticks, or sent copious emails to each other, wasting a lot of time, a lot of bandwidth, but most of all, causing a lot of confusion. Work would have stopped every time another person needed to review the files because having more than one person in the same file was almost impossible.

Another benefit of working in the cloud is that the content is saved every few seconds. That meant that if someone accidentally closed a browser, the work just waited for them to return whenever they were ready. There was no panic of having forgotten to save the document. Remember those days of panic? Yea, me too.

This was their first experience truly working in the cloud and I think they were impressed. From my standpoint, I enjoyed not having to take over someone’s machine to fix issues here and there. Whenever I have to do that, I feel like I am in someone’s space, invading their computer. And while I am always happy to teach anyone what they need, sometimes all that learning can be overwhelming and take away from the creativity needed to develop content. Being able to resolve things from my own machine while leaving them in their space and their own thoughts was an added benefit of working in this collaborative environment.

SharePoint Tasks Basics

SharePoint is very commonly used as a tool for managing tasks. Who is doing what when, and why aren’t they finished?

In my previous job I used the SharePoint task list to manage the 300+ projects our department had going on at any given time. I found it most useful when I connected it to my Outlook.

While not all the fields from SharePoint come across, and nowadays I prefer to work on tasks in SharePoint, I was able to configure my outlook to show me the task list by individual, which made it very easy to discuss projects and tasks with each person during our collective and also our one-on-one meetings. It was especially gratifying to do a walk-through one day and find that every task had an owner, the next owner had been identified and was aware, and it was just so wonderful to know that everyone was on the same page…. Aaaah the memories… But I digress.

A number of your team sites already contain a task list. If they don’t, ask your site owner to add one.

Adding tasks to a task list

Click on “New task” in the Ribbon, or use the “Edit” button to add several new tasks at once. Simply fill in the form and click save. It’s that easy.

Predecessors

If the task list is so enabled, you may be able to assign predecessors to a task. Predecessors are tasks that must be completed before you start another task. If your aim is to create a Gantt chart view, predecessors will be important.
To set a task as a predecessor, create the preceding task first. Then, select that preceding task while creating the next task that succeeds it.

Just a note on predecessors. They really only make sense if you create a task list for a specific project. Sometimes teams work off one task list for all their projects and tasks, and in that case, the predecessor list gets pretty long and unusable.

If you do use a single task list for your team, you use another mechanism to sort your tasks by project, such as using a lookup project list, or a column with project names. If you create a task list for a specific project, then using predecessors make sense. Else, they pretty much can be ignored.

Subtasks

Predecessors are different from subtasks. Subtasks are tasks that are a part of an overall task. Cracking eggs is a subtask of baking a cake. Cracking eggs might also be a predecessor to mixing the batter. It’s your choice as to how to organize these.

Ordering Tasks

To create a subtask, select the subtask by clicking the check to the left of the task, and choosing “Indent” under the task tab. Click on Move Up and Move Down to position the task beneath the main task. Click on the Stop editing this list button when you are finished.
You can then hide or display these subtasks by clicking the triangle to the left of the main task.

I’m personally not a big fan of subtasks – partially because I cannot copy a task with subtasks to another set further down the list. It doesn’t appear to correctly format. Perhaps you will have better luck though, and can teach me a thing or two about using subtasks.