
Using a condition to filter your data
Now that we have created the variables, added them to an email, we know that all the data is solid and that the flow works.
Now we can add the condition statement (think IF statements for spreadsheet and computer users) to filter what we need.
Remember, our goal for this project was to only display the people that joined our faculty 3 months ago.
There may be a number of approaches you can use to do the comparison. The way I chose to do it was to compare the month and year for today against the month and year for the 90 day variable.
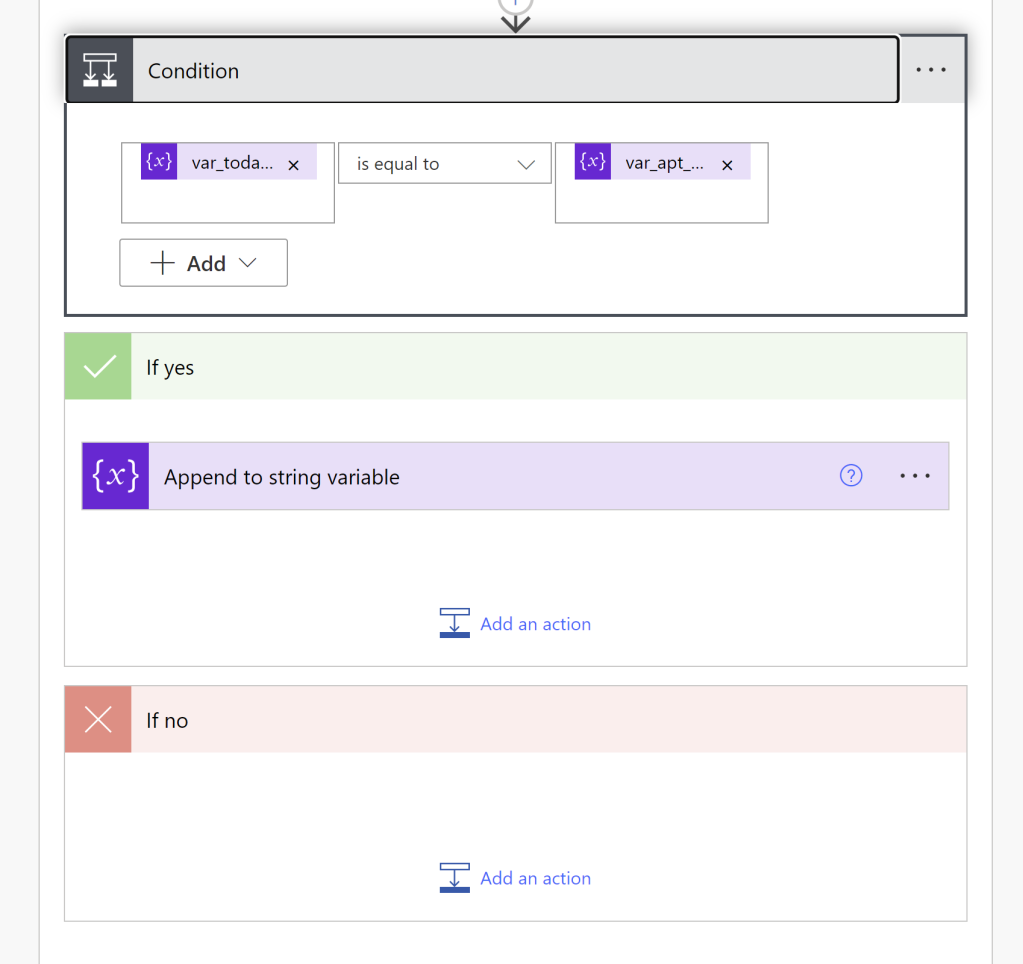
To do that, you add a condition action
In one field you add var_today_month_year
In the other field you add var_apt_plus_90_month_year
Set the condition to IS EQUAL TO
Then move the Append to String Variable action into the YES condition so that it will ONLY append the data from the row IF the two month-year variable match. i.e. if 2023-06 matches 2023-06.
Leave the NO box blank (so that nothing happens if the month-year fields don’t match)

One thought on “Extracting data from Excel using Power Automate (Part 5)”